
It’s so easy to start a blog these days – but launching into it without carefully thinking it through isn't a good idea. I did this years ago when I first started blogging because my enthusiasm got the better of me. Soon I had lots of content -- but no clear focus.
What I didn't consider is that a blog can become a business that makes money, even passive income. The more focused your content is from the beginning, the more quickly you can turn it into a profit-making machine.
So, spend a lot of time planning your blog before you dive in.
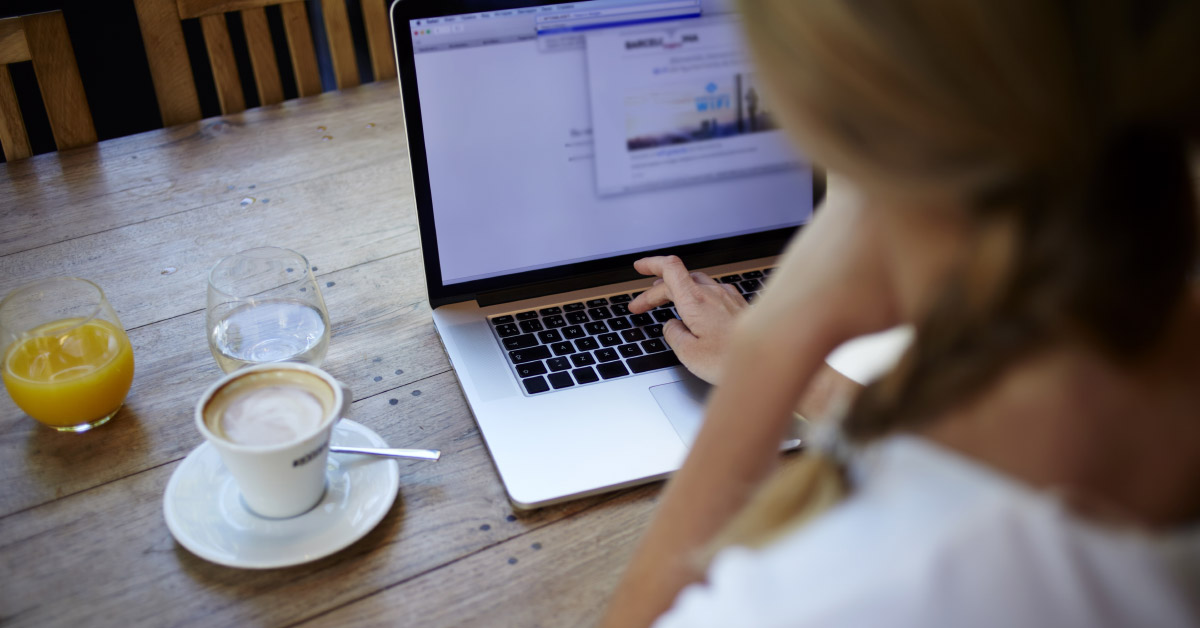
Photo by GaudiLab/Shutterstock
>>Affiliate notice: Some of the links here may be affiliate links.
When you do it this way, it will save you headaches and ultimately increase the chance that your posts can rank high on Google. I tell you this as someone whose first blog posts never ranked on Google at all!
Since I took this different approach, my posts often rank on Page 1 of Google searches organically, without me buying any ads. If you want to see some of my case studies about how I rank on Page 1, check them out on my other website here.
What This Post Teaches You About How to Start a Blog
In this article I give you an overview of the 10 steps you should take to start a blog on any platform. That includes Wordpress, Squarespace, and any others.
One thing to keep in mind when it comes to the 10 steps I’m going to go over here: You may be tempted to skip over some of these steps when you start a blog, especially when it comes to things like planning post categories, organizing posts for SEO (search engine optimization), and optimizing photos for the Web.
These aren’t the most exciting parts of blogging, but it’s important you set up a routine and do them every time you publish a post.
I promise you: Writing great content isn’t enough if you want to rank high. All the other steps you can take when producing blog posts make a big difference in getting your content discovered.
Plus, I’ve noticed that many companies aren’t taking the time to follow these steps. That’s better for us entrepreneurs and small businesses.
When you follow my steps, you can outrank the big companies’ content in searches. Every time I outrank the biggest media corporations in the world I know that it’s because Google believes my post has done a better job of answering someone’s question.
I also know that Google has found my post because I did everything I could to optimize it. Again, see my case studies for examples you can learn from.
But First, Why Start a Blog At All?
Blogging is one of the best content marketing tools out there. As a business person, I believe that blogging is one of the best paths to achieving your goals.
I’m also a professional national magazine writer and a pro blogger. I can tell you that your reach with blogging can be even greater than writing for magazines – and you can make even more money from the content you write by blogging.
These days you can get paid $500 by a national website to write an article. But you can make thousands of dollars if you publish that article yourself and put affiliate links.
Here are two main reasons why people and businesses create blogs:
1) Self-expression
When you blog for personal reasons, it’s a great way to express your opinions, passions, and plans. You let readers get to know you, and you publish your own work, which is incredibly satisfying! That’s not what I’m going to get into in this article, but keep in mind that you can always have two blogs: one for work and one for play.
2) Branding and authority
When you blog for business purposes, you can get your brand out there in a more authentic way than if you follow traditional marketing models.
Readers relate to blogs differently than they relate to straight-up marketing copy. They trust blogs because they’re written in a more casual way. People tend to trust their peers for advice, especially when it comes to buying things.
When businesses blog, they should commit to providing readers/customers with useful information. There’s too much low-quality information in the world. This is your chance to be different!
Plus, blogging is great for entrepreneurs and artists. As a book author, I can take blog posts and share them all over social media to find potential readers. I can also develop my authority in the eyes of other editors.
Ready to find out what the 10 steps are to start a blog? Let’s look at them now. I'm going to include all the things I wish I'd known before I started blogging!
-
Set Your Annual Blogging Budget
Before you choose an Internet service provider or buy a domain name, think about how much money you can spend on your blog each year. Running a self-hosted blog can cost from five dollars per month to $600 per year just for the hosting.
You may start out with a $10 per month plan like I did, then upgrade to a virtual private server (VPS) when your traffic goes up. (I'll get more into detail on this later.)
Also, you may want to buy photographs or illustrations, pay for plugins, and more. Those all add to the cost.
Why I don’t recommend that you start a blog using the free Wordpress hosting:
You can run a blog for free, but that won’t work if you want to be professional about it. Free blogs usually don’t let you include ads on them, or customize them the way you want. Many WordPress plugins and themes aren’t available for free blogs.
Plus, customer support may not be available for either. You will have to rely on support forums, which means that solving your problems can take a long time and you’re often relying on other users for help.
So with a free blog you’re working within stricter parameters – at least, stricter in comparison to what you can do with a self-hosted blog, which is pretty much anything!
Also, free blogs offer you limited storage. For instance, a free WordPress blog can hold about 3GB total. Imagine once you start loading up photos and videos. You’re going to burn through that fast.
I naively tried using a free WordPress blog when I started out years ago. I was afraid I couldn’t manage a self-hosted blog since I had no knowledge of coding. The truth is: I became frustrated within weeks and switched everything over to a paid, self-hosted blog. That created more work for me, but it was worth it.
I wish that I’d started with a self-hosted blog from Day 1. (Note: I still have no formal training in coding and I’ve designed many beautiful and complex websites, including The Decorated Way. You can too!)
Now I only start a blog using the free WordPress hosting if my family is going on a trip and I want to share daily updates with people back home. That makes it easy for me to upload photos with my posts and avoid sending multiple emails.
There are other problems with free blogs, too. For instance, you’re at the mercy of the host. WordPress has guidelines about how you can use their free platform. If you violate their rules, they can shut down your blog immediately.
Sometimes bloggers do this by accident and discover they can’t log in. That’s a terrible experience you want to avoid. For more information about that, read my detailed comparison "How to Use Wordpress for Free and Self-Hosted Websites."
Blogging can pay for itself
If you’re planning to make money off of your blog, it will eventually pay for itself. You can make money from it through ads you place on your blog; sponsorships you get from advertisers (this is when they sponsor your posts or a giveaway, for example); affiliate sales (when you link to affiliate products and get a commission from the seller); and other means.
But don’t plan on this happening right away. You will need to build up traffic first.
-
Plan Your Blog Content Before You Start a Blog
I recommend that you plan your blog content on paper or in a word processing program (like Microsoft Word).
I like using a program called Scrivener because it allows me to organize content in folders that I can move around within a document. I also find this makes it easy to convert a series of blog posts into a book.
Think big picture
First you want to think about the big picture. Here are some questions to ask yourself, whether you’re blogging for personal or professional reasons:
- Why are you blogging?
- What types of topics do you want to write about?
- What topics are you an authority on?
- Who is your target audience?
- What posts does your target audience tend to link to on other websites and blogs?
- What kind of blog posts can you write that will lead to lots of discussion among readers?
- What kind of blog posts in your niche(s) get shared a lot on social media?
If you start a blog with these questions answered, you can blog intentionally. This will avoid wasting your time and it can establish you as an authority in your niche more quickly.
If you want to blog about very different topics (for example, you want to start a lifestyle blog), you can do it. I’ve done it with my lifestyle and interiors blog using strategies I learned from over two decades as a professional lifestyle editor and writer.
One important thing you should know in this case is that you need to put yourself at the center of all the topics you write about. When you start a blog with many different topics, your perspective is as a tastemaker or curator, as opposed to just an authority in one niche.
That said, the most important thing of all is that you don’t get hung up on brainstorming for topics. Don’t let perfectionism or fear of failure prevent you from launching your blog! You can always revise your content plans later.
But you’ll enjoy the process a lot more if you have some idea of where you’re heading with it from the start.
Make an editorial plan
When you plan your content, you should think about your annual editorial plan, your monthly editorial plan, and your weekly editorial plan.
For the annual plan, think big. What are you trying to achieve during the next year?
For the monthly plan, think about what’s going on in general that month. It’s nice to feel that your content is tracking with relevant themes.
For the weekly plan, you have to take a realistic look at how much time you can dedicate to producing content.
Don’t overdo it. Most people have expectations that are way too high at the beginning. They get burned out trying to meet them and then feel like they failed. Been there, done that too!
Avoid burnout by asking yourself first how many hours you really want to spend on content. Then figure out how many blog posts you can get out of it.
It’s better to have one good blog post per week than three low-quality ones.
-
Choose Your Blogging Platform
When blogging first started there were only a few choices of platforms to blog on. Now there are are so many, which makes it difficult to know which one is best for you.
WordPress:
My blogging and website platform of choice is WordPress. I run self-hosted WordPress blogs. I can do everything I want with them, without even knowing how to code.
WordPress operates on Open Source coding, which means that any developer can use the code base for free. The WordPress software to run your blog is always free for you.
This Open Source coding has resulted in so many Web developers using it to create fantastic themes (there are upwards of 5,000 out there!) and plugins that work with WordPress self-hosted websites (we’re talking more than 45,000 plugins to choose from).
People love WordPress for good reasons – and it powers over 90% of all blogs. It also powers lots of websites, even ones that are run by huge corporations. So even though WordPress is referred to as blogging software, it can be used for full-blown websites as well.
Squarespace:
For people who want to blog on a beautiful platform but have a bit less control over the final outcome, Squarespace is a fantastic option. The Squarespace team handles all the backend things for you; in WordPress you have to do things like go into your own hosting dashboard (called C-panel) to troubleshoot problems. (If you use InMotion Hosting or Bluehost as your Web host they can help you with that.)
Technically you can have loads of control over Squarespace, but you’d need to go into developer mode. If you’re not a coder, or you’re uncomfortable with technical things, I think Squarespace is a fairly easy and very good-looking option.
I like using Squarespace for clients who want sites that are mainly aimed at showcasing their portfolios.
The Squarespace platform comes with dozens of beautiful templates that you can customize a lot. You can’t easily add tons of plugins. But they have built-in things like ecommerce, email forms, popups for marketing, and more. I highly recommend that you look into it if you’re new to blogging and don’t want to tackle WordPress.
Other options:
Some people like to use Wix, Tumblr, Blogspot, Weebly, and Blogger.
-
Choose and Buy a Domain Name
Domain names are like your calling card on the Web. They’re also called URLs. For example, one of my domain names is decoratedway.com. The “www” isn’t part of the domain name when you buy it.
You do have to buy your domain name. They cost around $10 per year. Then you may want to pay another $15 per year to protect your privacy. That means that when people look up your domain name in Internet databases to see who owns it, they won’t see your personal information like your street address or telephone number.
Instead, they’ll see the information for your Web host. I always pay extra for privacy, even for domain names that I have parked. Those are domain names I’m not currently using. The reason is I don’t want spammers getting in touch with me.
It’s extremely easy to buy a domain name for your blog In fact, it’s almost too easy -- you have to be very careful not to buy a name that’s going to infringe on another company’s trademark.
So really the first thing you need to do before you settle on a domain name is check the name you want in the US Patent and Trademark Office database called TESS. There’s a whole art to checking trade names, and you should definitely take it seriously.
I also recommend that you check the name you want in Amazon.com and on Etsy.com, since those are common places where people sell things under trademarks.
Plus, you should check the major social media platforms you may be using. You don’t want to cause any confusion with someone else’s brand. It’s not good for your business or theirs.
Once you’ve chosen a blog name that you think won’t cause confusion, you can buy the domain name through any Web registrar.
Here are some more guidelines for choosing a domain name:
- Have it track with your branding
- Make it easy for people to type
- Make it easy for you to tell people (odd spellings of common words will carry a learning curve)
- Keep it short (I sometimes break this rule with my domain names, like housepublishingclub.com).
-
Choose a Web Host
You need a Web host in order to start your blog and get it live on the Internet. A Web host stores all the files for your website on it. That means written content files, photos, videos, etc.
Some people pay extra to have some of their files stored by other hosts, to make their websites faster. These are called CDNs, or Content Delivery Networks. But to start with all you need is one Web host.
If you’re going to use a platform like Squarespace, it functions as your Web host and your blogging software. So you will only need to sign up for an account with it. This is also true of free WordPress blogs (called “hosted WordPress blogs” because WordPress hosts them for you).
But if you’re planning to start a self-hosted WordPress blog, you will need to sign up for a Web host that will keep all your website files on it and power your site. An example of a Web host is InMotion Hosting and Bluehost. More on them coming up…
Most Web hosts offer very cheap plans for as little as $3 per month to host a website. These plans are good for starting out and you can always upgrade your plan later when you start to get a lot of traffic. (I didn’t need to upgrade until I was getting 10k hits per month.)
Just know that when you pay these low amounts for Web hosting, you’re sharing a server with a bunch of other websites. That means that if some of them are getting a lot of traffic it might slow down your site.
The most important thing to consider when choosing a host is customer service. Get one that offers help quickly via live chat and phone.
I’ve used InMotion Hosting for over a decade and I love it because their support team is available to me 24 hours a day. They’ve taught me a lot about the technical side of things, and I can call and ask them questions by phone. I find that’s a lot easier than using a chat box, though I do use a chat box for simpler questions.
Another great host is Bluehost. Lots of well-known bloggers use it and I recommend it based on what I’ve read.
Both InMotion Hosting and Bluehost allow you to install WordPress on your website with the click of a button. That makes it so easy and it takes a few minutes.
(Just FYI: When you upgrade as I did to a virtual private server, then you will have to install WordPress manually, which isn’t hard but it requires a few more steps and some knowledge.)
Bluehost also will give you one free domain name when you sign up with them.
To find out which plan is best for you, go to inmotionhosting.com or bluehost.com and check out their pricing plans. Or research other Web hosts out there.
-
Plan How Your Blog Will Be Organized and How It Will Function
This is where you need to think big picture. Don’t plan it after you’ve gotten your blog set up. You can end up changing things, and on a website that can lead to lots of redirected pages or accidental broken links.
I used to plan on the fly from within my website, but I stopped and started doing it on paper first. Since then my entire process has become easier and more efficient.
Some items you need to plan include:
- your navbar menu items (what links will appear in your menu) – these are the broadest topics; try to limit to 6
- the topics you will cover on your blog
- your post categories and subcategories
- what content will appear in your header and footer
- what logo you will use, if any
- what social media accounts you want to link to
- what type of extra functionality your blog needs
- and more!
This process of designing a website “offline” is called wireframing. I do it for all my websites. It means that you draw exactly how your main pages will look. You can do this by hand and sketch it. Or you can do it with a graphic design program.
I create my wireframes in Canva using templates I’ve created.
There are also programs you can use that are specifically for wireframing, and these will let you link your pages so you can see exactly how your website will function. They’re a bit more complicated to learn and you often need to pay for them.
Sometimes there are free versions of the software but with a limited number of pages. You can Google “wireframe software” and you’ll find them.
-
Choose a Theme and Build Your Blog Online
Building your blog includes:
- setting up your domain name and database with your Web host
- installing your blogging software (such as WordPress)
- installing and activating your theme and any plugins
- formatting your admin dashboard on your website
- formatting pages and permalinks (URLs for your posts and pages)
- and implementing all the design ideas you had when you create a wireframe.
This is when you’ll do the most work. If you want to set up a simple blog, you can do this quickly. But this is the phase where I expect to spend more time because I like my websites to be complex. And I pay a lot of attention to details like fonts and colors.
When you get to choosing a theme, don’t be overwhelmed. You can start researching themes on Google, to find ones that go with your niche. That’s a good way to find theme developers who may have a similar focus or aesthetic to yours.
I don’t recommend that you use a free theme because often there’s often no support for them. The developers don’t necessarily update them often, which means they can make your website vulnerable to hackers.
Expect to pay from $25 to $70 for a paid theme. One of my favorite places to buy themes is Theme Forest on the Envato Marketplace.
Another popular option is Themify, which specializes in Wordpress themes that are mobile-responsive and come with their own drag-and-drop page builder.
Then there's StudioPress. It has tons of beautiful Wordpress themes that use its Genesis software. They have general themes and ones for niches, such as their Lifestyle theme and their Foodie Pro theme, just to name two.
-
Produce Your Content
To do this, you may need to research topics and keywords, do interviews, or figure out what stories you want to tell.
This phase includes planning out the structure of your blog posts, which is important for readers and for search engines. The better you organize it, the easier search engines like Google can search and read the text to see how informational it is.
Remember: Blog content can include written posts, video posts, podcast posts, and more.
I like to jot down the bullet points I plan to cover in the post; write my content as a first draft using them as a guideline; and then go back in and rewrite.
It’s during the rewriting phase that I add more research, edit my copy, and organize my post with subheds (also called subtitles).
This is where I do the bulk of my SEO (or search engine optimization). I want to be sure that my post is going to be useful to my readers and Google.
-
Create Visuals to Go with Your Content
This can include photos, videos, GIFs, podcasts, and illustrations. You will definitely need, at the bare minimum, one featured photo for each post. I use Canva for Work to make my visuals that include words and graphics. I also use Creative Market for buying things that can make my visuals more beautiful.
You should also be sure to format and optimize your visuals for the Web so they are the smallest file size possible without losing quality. You can do this using programs like Adobe Photoshop, online photo formatting software for your computer like Optim, or mobile apps.
One big thing to remember is that your visuals will resize for all kinds of devices. This is especially important for visuals with words on them.
Text that’s easy to read on a laptop may look blurry on a cell phone. So you need to test your visuals on different devices to find a middle ground.
-
Publish Your Content
This is the truly rewarding phase! It’s when you:
- add your visuals to your posts
- do your final top editing for things like spelling errors
- customize the URL for your post
- and do things like checking your post for SEO one last time.
Then you get to hit “publish” and share it with others!
If this sounds like a lot, it is. But the amount of time it takes largely depends on you, so don’t be discouraged from trying!
If you want to put one photo with a post, that won’t take long – especially once you learn the editing software. If you want to put 10 photos or a video you create, that takes longer.
The area where many bloggers skimp is on the search engine optimization. I’m obsessive about organizing and formatting my copy for search engines and it’s paid off. Like I said earlier, my posts often rank on Page 1 of Google searches, or even at Number 1, and I don’t buy ads to get them there.
My favorite plugin for SEO within Wordpress is the Yoast SEO Premium plugin. One of my favorite online tools for auditing my SEO performance more extensively is Seomator.com.
Ranking high on Google searches requires you to develop a discipline and stick to it, every time you post. You may not see the search engine results right away, but over time you will if your posts are really answering people’s questions.
Conclusion
That’s it for my overview of How to Start a Blog in 10 Steps. Please let me know if you have any questions by leaving a comment below or using my contact form. I'd love to hear if you enjoyed reading this post!
If you haven’t joined The Decorated Way Members’ Club waitlist yet, sign up now. In the club I’m going to teach members how to do the things I talked about in this post.
And if you're interested in publishing content about houses (like an interior design blog or book), or you want to get houses published in magazines and websites, you can:
- Join The House Publishing Club today
- Take my online workshop Get That House Published.